Section: Service Procedures
Subject: Using the Scheduler for Starts
Approved by: Tony Massey
Effective Date: 29 January 2001
Last Reviewed Date: 14 October 2025
Policy Owner: Director of Administrative Training
Policy #
Purpose #
This procedure outlines the process for scheduling starts using the ServicePro Scheduler. This tool allows for visibility from any service center or Customer Care, ensuring a consistent and accurate scheduling process.
Part 1: Building the Calendar
- First, get the customer’s address from the Sales Inspector. This will determine the route.
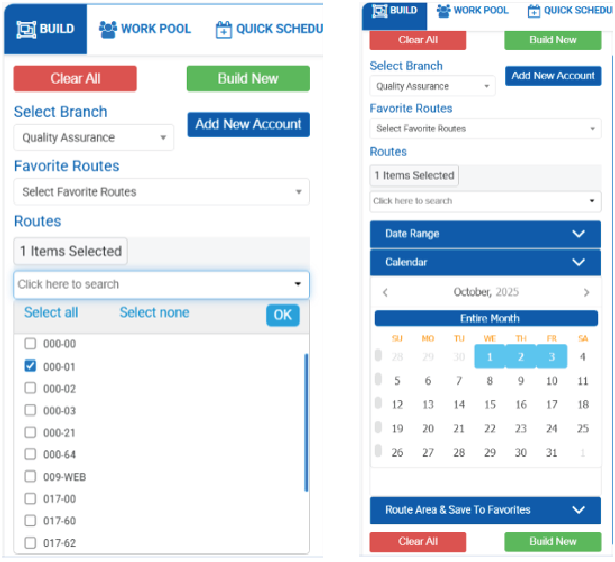
- In Scheduler, select Build.
- Choose the correct Branch (Service Center).
- Select “Click here to search” to view the Route menu, select the route, and click OK.
- Next, choose either the Date Range or Calendar option. For example, under Date Range, you may select options such as “Today & Next 2 Days” or “This Week,” while the Calendar allows you to select a specific date or date range.
- Click Build New.
Part 2: Scheduling and Creating a Block Time
- Work with the Sales Inspector to find the best day and time for the appointment.
- To open the Block Time window, you have two options:
- Option A: Click directly on an open time slot on the calendar. A pop-up window will appear. (Figure 3)
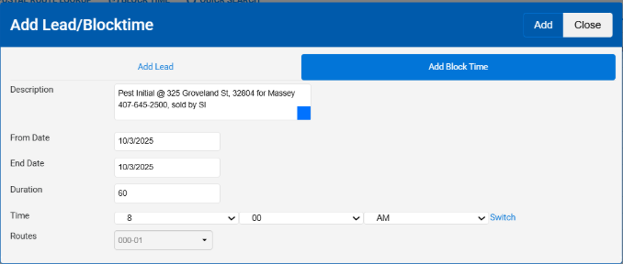
- Option B: Click Block Time at the top of the screen. The Block Time fields will appear on the left side, like the Build screen. (Figure 4)
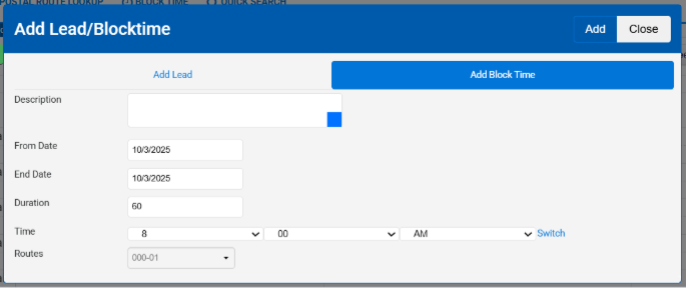
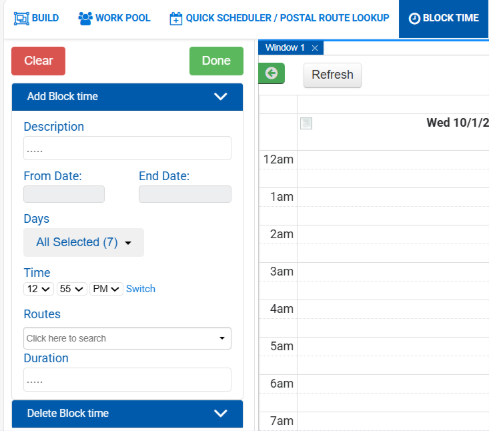
- Complete the required information in the fields:
- Description: Include the service type, street address, zip code, customer’s last name, phone number, and the initials of the team member who sold the service.
- From Date and End Date: These will auto-fill if you use the calendar.
- Duration: The default time set by the Scheduler is 60 minutes, but you will adjust it as needed. Refer to our Service Standards for specific guidance.
- Time: Enter the service time agreed upon with the customer.
- Route: This will auto-fill if you use the calendar.
- Finally, click Add (or Done if you used the header link).
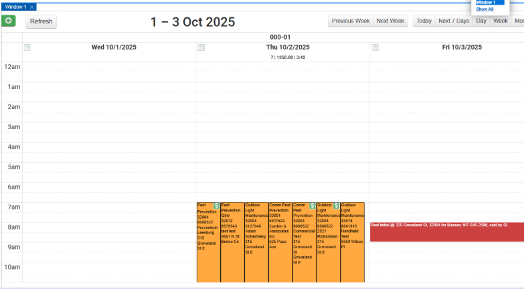
Part 3: Confirmation
- A green notification will appear, confirming the block time was created successfully.
- View the new appointment on the calendar. If you don’t see it immediately, click Refresh.