Section: M&S Control
Subject: Procedure, Receiving Purchasing Orders
Approved by: Tony Massey
Effective Date: 21 December 2021
Last Reviewed Date: 21 December 2021
Policy Owner: ERP & Finance Manager
Policy #
Service Managers are responsible for properly issuing and recording all products transferred from the Office Warehouse to a service vehicle. “Transfer Journals” must be completed immediately following any issuance from Warehouse (W-SCxxx) to a service vehicle (TLxxxxxx). However, all purchase orders must first be received in D365, ensuring materials are available for transfer (See SPP 803 Receive a Purchase Order).
Transferring Products to a Truck #
1. Click “Expand all” and then “Transfer.”

2. Click on “New” (found on the top left).

3. The Overview window, as seen in the picture below, will default to the correct information.
4. Click on “OK” (bottom right).

5. Click “New” (found in the top left corner of the Journal lines window).

6. In the Item Number field, click to enter product number or name. A drop-down box will appear as you begin to enter the product number. You may click to choose the correct product from the drop down box. Make sure the date reflects the day of the transfers.

7. Click “From site” field to open drop down box and choose the correct service center.

8. Click “To site’ field to open drop down box and choose the correct service center. It should be the same as the From Site.

9. Click “From warehouse” field to choose your service center.

10. Click “To warehouse” field to choose the correct truck/technician who will be using the product on their truck.

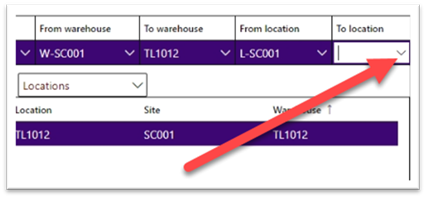
11. Click “From location” to choose your service center from the drop-down menu.

12. Click “To location” to choose correct truck/technician who is using the product.
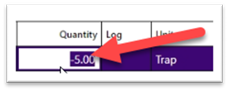
13. Enter the quantity of product being transferred. Make sure the quantity matches up with the unit. If the Unit column is not visible, contact AX Support to add.
14. If you have another product to transfer, repeat steps 7-15.
15. Once all products are entered, click “Post” (found in the top menu under the Finance and Operations bar).

16. Click OK.
Transferring Products to a Truck Using the iPad #
1. Log in to Dynamics AX on the iPad.
2. Tap “Inventory Transfer Journal.”

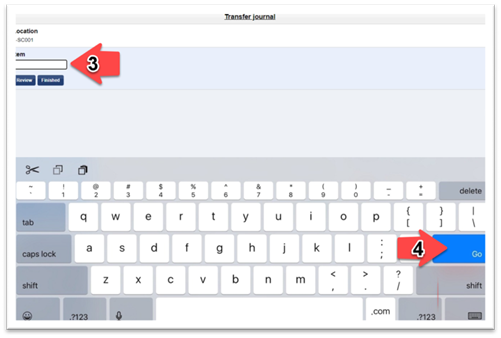
3. Type in product number or scan the barcode.
4. Tap “Go.”
5. Type in Quantity. Make sure the quantity matches the unit.
6. Tap “Go.”

7. If there are more products to transfer, repeat steps 3 through 6.
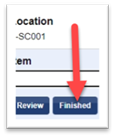
8. If all products are transferred, tap “Finished.”
9. Enter the warehouse number or scan the barcode for the vehicle.
10. Tap “Go.”

11. Once the iPad transfers are complete, log in to Microsoft D365 on your computer.
12. Click on the 3 bars icon in the left menu bar to access the modules.

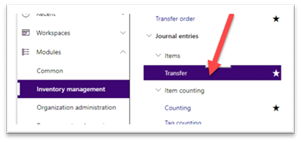
13. Click on “Inventory Management.”

14. Click “Transfer.”
15. Click “Show user-created only.”
16. Scroll to find the Inventory Transfer just completed on the iPad (newest entries are on the bottom) and click on the MSC-######.

17. Review the details in the Journal Lines window.
18. Click “Post.”

19. Click “OK.”