Introduction #
Fleas are one of the more important groups of insect pests. They cause discomfort by biting and have the ability to transmit disease such as plague and murine typhus. Cat fleas are the most common domestic flea. They are found throughout the world and are pests of both cats and dogs. Fleas are also a pest of humans.
 Flea bites on dark skin.
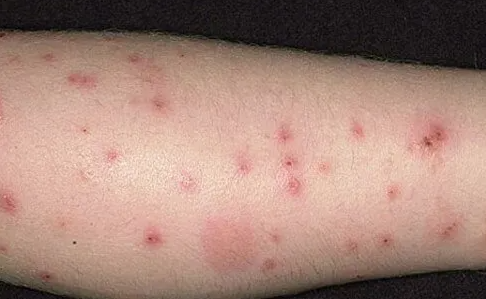 Flea bites on pale skin.
Identification #
Biology #
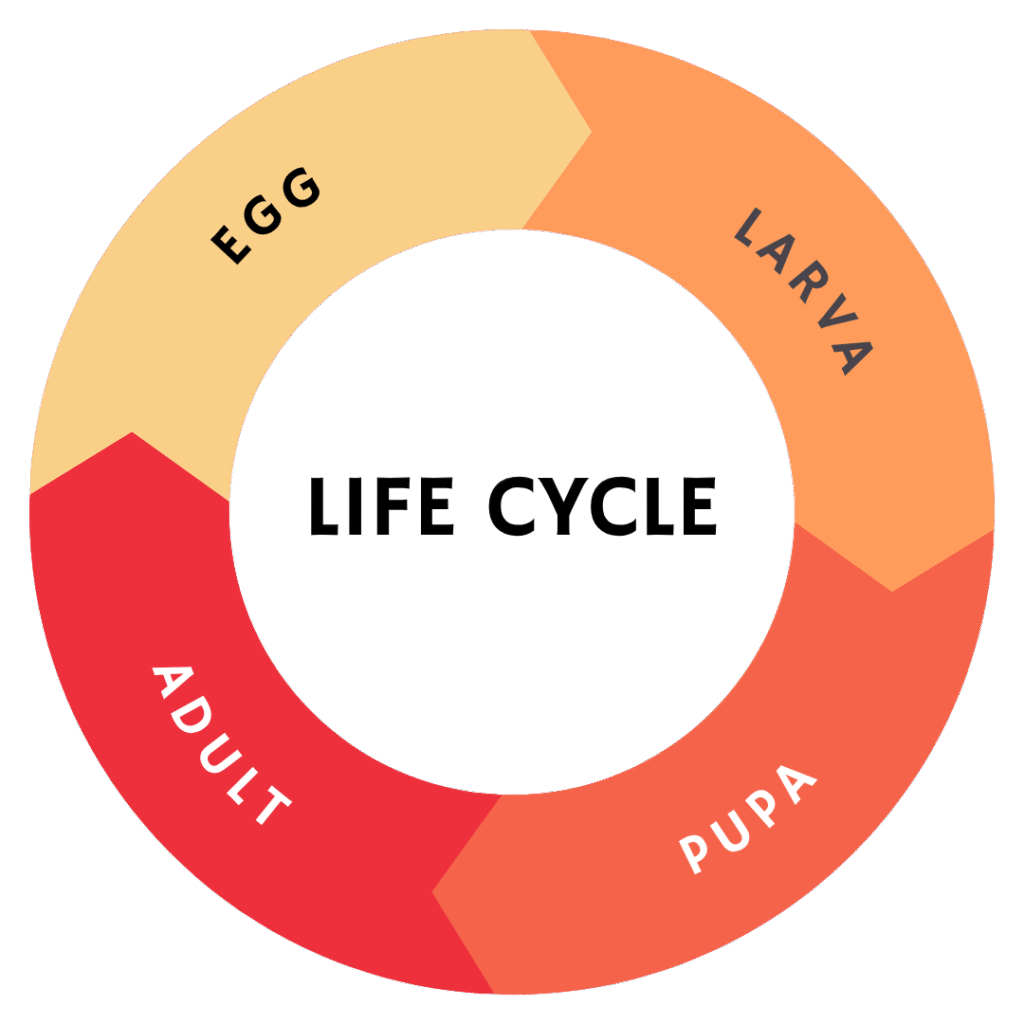
Fleas pass through four stages: egg, larva, pupa, and adult. After feeding, adult fleas lay eggs on the host or in surrounding areas like carpets and bedding. Eggs hatch into larvae that feed on organic debris before spinning cocoons as pupae. Within the pupal stage, adult fleas develop and emerge when triggered by movement or heat—ready to feed and continue the cycle.
Eggs #

Eggs are smooth and unlike many insect eggs they are not glued to hairs or placed into protected areas. The female flea lays eggs on the body of the host as well as surrounding areas where the host frequents or sleeps. Eggs laid on the host (pet) will fall off during movement or when they shake. Hence eggs can be found throughout the area the host lives in but most frequently are found in floor coverings, cracks, crevices and bedding. Eggs are whitish about 1/64” long and usually hatch in about 2 days (range 1-12 days). Insecticides have little to no effect on flea eggs.
Larva #

Flea larvae are usually found where animals sleep or frequent. Larvae do not bite but do have chewing mouthparts and feed on organic debris found in their environment. Much of the protein required for larval development is acquired from dried fecal matter of the adult fleas. Larvae easily desiccate requiring relatively high humidity to survive (45% to 95%). It may take as little as a week and up to several months for larvae to go through 3 growth stages (instars) prior to pupating.
Flea larvae avoid light and migrate to the darkest parts of the room such as under the pet bed, under sofa pads, and under objects near where the pets sleep. It is extremely difficult to vacuum up larvae because they cling to objects with their many bristly hairs. After developing fully, the last instar larva spins a silken casing in which to pupate. This casing is camouflaged by debris found in the surrounding area.
Pupae #
In the pupal stage the flea changes from the wormlike form of the larva into the six-legged form of the adult. Under favorable conditions the pupal stage may last from 4 to 14 days. Under less favorable conditions this stage may take up to a year. A fully developed adult can remain in a stasis mode in the pupal casing for up to 20 weeks awaiting indicators (vibrations, movement) that a host may be nearby. Pupal casings are usually found near and where animals sleep or frequent and protect developing fleas from harsh environmental conditions as well as pesticides.
 Flea cocoons & pupae.
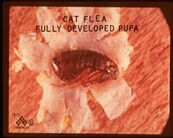 Fully developed pupa.
Adults #

Adults are stimulated to emerge from the pupal casing (cocoon) by mechanical depression of the cocoon, increased temperatures, vibrations or movement near it.
After emergence, usually 4-14 days, adults seek a blood meal. In the absence of a host they can live for several months on body fat that was stored during the larval stage and not used while pupating. Actively feeding adults typically live 25 days (+/-) but may live up to a year. Adult fleas are about 1/16th of an inch in length and are flattened from front to back which eases their movement between the hosts’ body hairs. The flea body is hard and reddish-brown in color.
Adults spend most of their time on the body of the host, feeding, mating, resting and (females) laying eggs. Although there is a preferred host (cats), fleas can bite and survive on many other warm-blooded hosts.
Flea Habits #
It is not necessary to have pets (animals) in a building to have fleas. With the ability to jump 6 inches or higher fleas are good hitch hikers. Fleas are found where animals sleep or frequent; including along their travel paths. Outdoor originating fleas can easily jump onto on shoes, pants or legs and ride into buildings. Eggs, larvae and pupae are found both indoors and out, where adult flea fecal matter accumulates.
Temperature and humidity will have an effect on flea larva development; they are unable to survive at temps below 55°F or above 95°F and humidity below 45% or above 95%.
Treatment #
Flea Control #
Flea control is a 4-part process
- Inspection
- Preparation/Sanitation
- Pet Treatment
- Treatment of the premises
Part 1: The Inspection #
Ask the homeowner/tenant for permission to perform an inspection. This will serve to identify and confirm the presence of fleas as well as the areas where pets spend most of their time. It is important to concentrate on these locations at time of treatment. During the inspection of the house plan a strategy for treatment and calculate the square footage to be treated. This information will be used to plan the service and determine the volume of materials required to complete the service.
Methods to determine presence of fleas: #
- Locate a pet resting area and lay a white cloth down and pat the floor; this activity will draw adults to the cloth.
- Put knee-high white socks over your shoes while touring the house; adult fleas will be attracted to your movement and can be easily seen on white socks.
- Inspect pet bedding. It is likely that one or more flea stages can be found.
- Inspect contents of vacuum cleaner bag. All stages of fleas may be found in the bag contents.
Points to inspect when evaluating pet movements and habits: #
- Favorite resting or sleeping spots
- Under, behind or on furniture
- Warm areas, close to heating units, window sills or on carpeting where sun shines through windows.
- Pet houses or bedding
- Under porches, crawl spaces, runways, between the house and shrubs in shaded areas where pets rest.
After completion of the inspection the following should have been determined.
- Flea existence
- Source of infestation
- Flea “hot spots” (pet bedding, sleeping spots)
- Square footage to be treated
- Strategy for treatment
Prior to providing curative services for fleas Massey Services provides the homeowner/occupant information and instructions to guide them in preparing for treatment. This information includes the Massey Flea and Tick Prevention Checklist on the last page below. The following steps should be followed by the customer before any flea treatment is done.
Part 2: Preparation/Sanitazion #
Sanitation plays an important role in the control of fleas. Vacuuming furniture, carpets, other fabric-covered surfaces and disposing of the vacuum bag is a common first step in flea control. Vacuuming only removes the eggs, adults and adult feces. Larvae and pupae remain.
Other steps include removal of toys and pet dishes, fish tank covered and unplugged, air conditioner turned off, pet bedding removed and cleaned, mopping of all tile and vinyl floors, sweep all floors that cannot be mopped. Remove clutter and personal items from floor surfaces including closets, and under beds to allow access for treatment. Also, if a family pet travels in the family vehicle it may be necessary to control fleas inside of the vehicle, but do not use chemicals for control in vehicles.
Some of our products may damage interior vehicle plastics. Vacuuming can be used to control this population.
If these steps are not followed by the customer each time treatment for fleas is provided, there is a high probability of failure and customer dissatisfaction.
Affirm with the customer that all treated surfaces must be allowed to dry completely before people and pets can enter the treated areas. Arrangements must be made for
people and pets to be away following the completion of the service until all interior surfaces are dry.
Part 3: Pet Treatment #
It is the responsibility of our customer to treat or have their pet treated for fleas at the time of our service. Home or veterinary provided flea dips/baths are one method. Another is a once-a-month treatment for pets that will help keep fleas from re-infesting the home. If the animal is allowed outside the owner should take steps to remove fleas that were picked up before coming back inside. This can be done by brushing the pet or lightly spraying it with a flea spray before allowing the pet back inside. These preventive steps will eliminate fleas picked up by the pet while outside.
Part 4: Treatment of the Premises #
Treatment Protocol for Fleas Indoors #
It should be expected that flea activity will persist at some level and follow up inspections and services will be required to complete the task.
Specific indoor areas will need to be treated with an adulticide and larvicide. This is best accomplished with a pressurized can of both materials together such as Alpine Flea. (Massey’s treatment will kill the larvae, and only the last generation of pupae remain alive to emerge daily for a few weeks until all have emerged. Following the treatment, daily vacuuming and interior movements of humans and pets help the last of the pupae to emerge).
Start treatment in corners of the rooms and work your way backwards so that treated surfaces are not walked on.To maintain a consistent and effective spray pattern, apply per label directions.
While treating for fleas you will encounter several different surfaces. This following list makes recommendation on how to treat specific surfaces.
- Apply on the carpets or rug with a directed mist release per label directions.
- Hardwood floors, cement and/or linoleum/tile floors; spot treat only the cracks and crevices around the baseboard with a dust. The mist does not generally stain the finish, but a test spot should be made if the top of the floor will get wet. Excess material should be wiped off the floor. The mist should only be directed below or behind baseboards and in gaps where floorboards join the size of a credit card or wider.
- Dirt floors & crawl spaces: use coarse fan spray from backpack or B&G.
- Apply on durable sofas and chairs and under their pads but be careful if the material is brightly colored or extremely thin and silky that water might stain.
- Upholstered furniture: use pressurized material and treat only the underneath side on the un-upholstered material.
- Windowsills: these are favorite resting areas for cats, make crack and crevice applications.
- Always carry a clean cloth with you during flea treatments to wipe off material that was applied or drips onto unintended surfaces.
Flea infestations are very difficult to eliminate. Several follow up inspections and services may be required to fully eliminate the flea population. A Proactive Follow-up service should be scheduled no more than 7 days after the initial service and every 7 days thereafter until all activity has stopped. The growth regulator applied during the initial service will remain in the treated area for a minimum of 90 days.
Encourage the owner/tenant to vacuum frequently to stimulate larva and adult flea movement through the residual materials and IGR. Vacuuming will not diminish the performance of the residual material or IGR.
Flea Control Outdoors #
Controlling flea populations outdoors can be challenging. Usually, treatment of the pet and our indoor flea treatment protocol is sufficient to gain control, but in some cases, this is not enough if the major flea source is located outdoors. Treatment of this source is accomplished using a granular product or backpack sprayer. In some cases, the population is high enough that backpack or granular treatments are not enough. In most residential situations, the foam application described below will efficiently treat the harborage areas. For very large areas, GreenUP is asked to treat using large volumes of liquid to penetrate ground cover to deliver insecticide to flea harborage points. There are challenges when GreenUP is involved in this type of treatment.
Treatments must be timed when a vehicle is in that location, mixing tanks must be clean to eliminate stain damage to home exteriors and GreenUP should be compensated for this application. The ideal way to approach this challenge is to give our pest prevention technician the ability to deliver a larger volume of liquid when treating fleas outdoors.
When GreenUP performs this treatment, the GreenUP Specialist must ensure that the drop tank is clean of any materials that may stain surfaces or damage shrubbery. One ounce of Bifenthrin is used per 4 or 5 gallons of water depending upon the vehicle type. Outdoor flea harborage areas are treated. These areas include shaded areas of turf or open soil and the ground under shrubbery and between the shrubbery and the home. It is rare that fleas will be in high populations in open areas of full sun.
Foam Application of Insecticide #
Pest Prevention Technicians treating larger areas outdoors will use foam and water as a carrier for our flea control product applied to outdoor flea harborage sites (lawn and shrub beds). Foam has several advantages as a carrier: it expands water used to a ratio of 1 to 10 for a better coverage, foam breaks down the external waxy layer of an insect causing absorption of insecticide quicker, foam and insecticide will control all stages of fleas (adult, larvae, pupa and eggs).
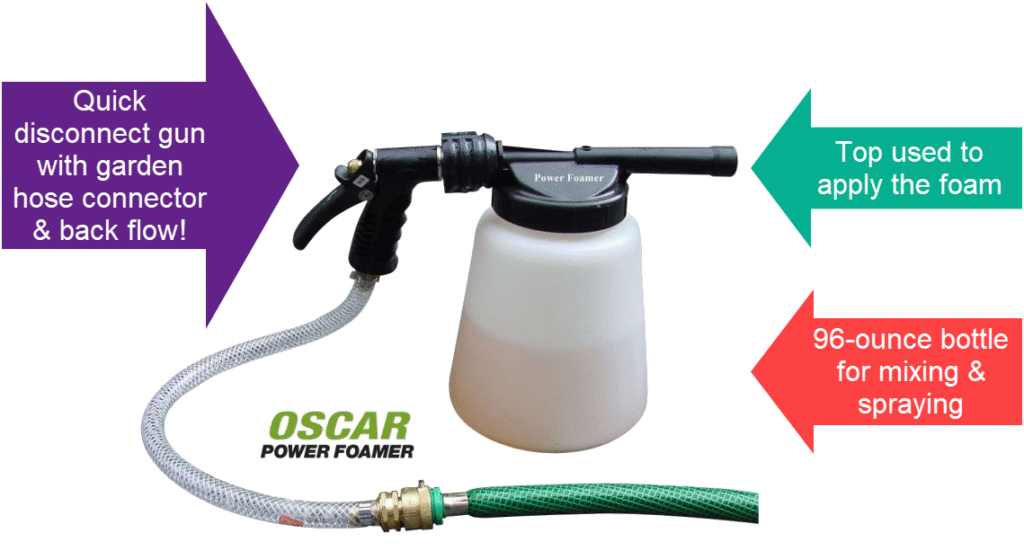
The application equipment we will use is the 96-ounce Power Foamer (Hose End) manufactured by NPD, which attaches to a standard garden hose. This equipment is composed of a 96-ounce bottle (for mixing and spraying), top used to apply the foam spray, quick disconnect gun with garden hose connector and back flow preventer. The customer’s water and hose can be used in this application procedure.
Foam Application of Insecticide & Application Procedure #
 Connecting the water source to the foamer.
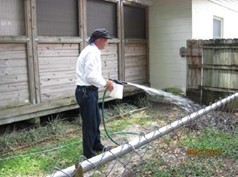 Spraying the mixture.
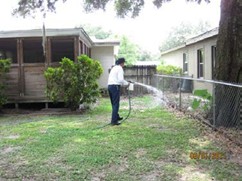 Moving in a side-to-side motion.
Before adding product fill the bottle to the 96-ounce mark with water, add 3 ounces of ProFoam Platinum and a residual material labeled for flea control for enough to treat 1000 sq. ft. Information for the proper amount of material to apply to 1000 sq. ft. can be obtained from product labels. 96 ounces of mixture is applied to 1000 sq. ft. of lawn and/or shrub bed.
Determine the square footage of the area to be treated: (length X width = square feet).
- Start at the far edge of the area to be treated
- Pull the gun trigger to start liquid foam flowing from the nozzle; you will notice a stream of foam which will travel about twenty feet.
- With the liquid foam flowing, move the Power Foamer in a side-to-side motion. Move slowly to get complete coverage of the area being treated.
- Always move in a backward direction as you continue to treat desired area.
- 96-ounces will cover 1000 sq. ft., so use all of the contents over 1000 sq. ft.
An outdoor flea population can be eliminated with one application when using this technique. The application equipment and product can be easily used by our pest prevention technician, eliminating the need to apply large amounts of granular insecticides or soliciting the help of GreenUP to apply a large volume of water and insecticide. It takes 20 minutes to measure, mix, and apply the product to 1000 square feet. Inform the customer that people and pets must stay off treated areas until dry. Make sure to rinse out the foamer following every use, because if left unwashed overnight, a shellac-like coating inside forms and be extremely difficult to wash out.
Current Customers Needing Outdoor Flea Treatments #
Pest customers, regardless of having our GU Lawn service, are treated for fleas free of charge indoors. If fleas are causing a problem from the outdoors, “hot spots” can be treated by the pest technician via backpack and/or granules at no charge with no outdoor guarantee. Should the customer want the entire yard treated, then we must upcharge at the rate card rate a single treatment with 30-day guarantee and use the foamer per the treatment protocol above. For multiple acres contact Technical for information about use of live flea-parasitic nematodes.